 +86-573-85605006
 zhouyueliang@L-jie.com
Why Decorating a Tote Bag Works (And Why Material Matters)
A plain tote bag is one of the most versatile creative surfaces available — inexpensive, flat, and built to last through dozens of washes. But not all tote bag materials respond equally well to every decoration method, and choosing the wrong technique for your fabric is the single most common reason DIY tote projects fail to deliver the result you pictured.
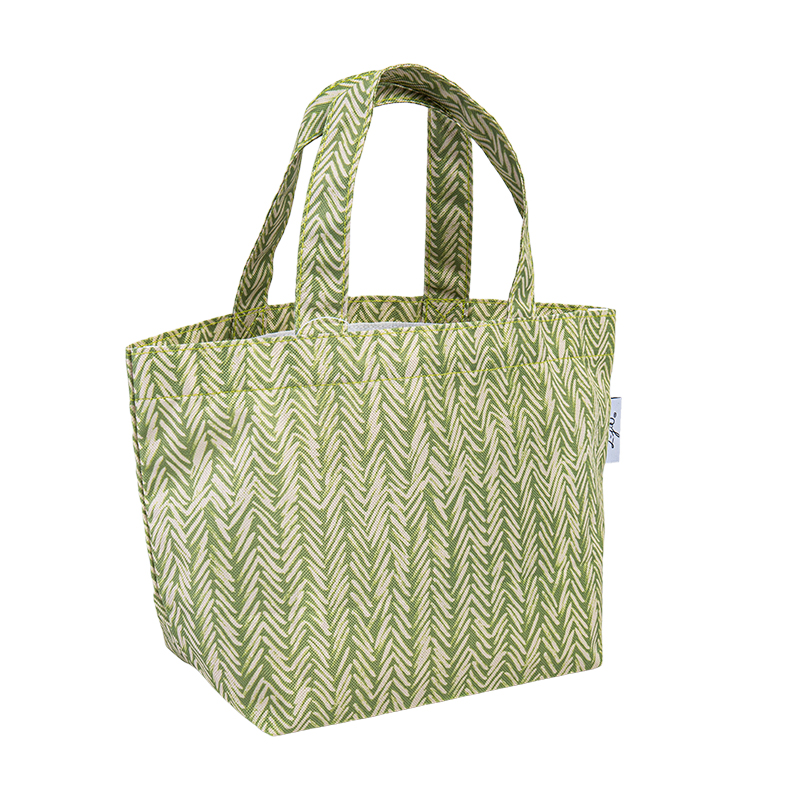
The three most common tote bag base materials each have distinct decoration characteristics. Canvas (100% cotton or cotton-linen blend) is the gold standard for decoration: its dense, slightly textured weave absorbs fabric paint evenly, holds embroidery thread without fraying, accepts heat transfer vinyl cleanly, and survives repeated washing without fading. Oxford fabric (polyester-based) is smooth and water-resistant, which makes it excellent for iron-on transfers and printed designs but less cooperative for hand embroidery or fabric paint, which can bead on the surface without proper preparation. Non-woven polypropylene — common in budget promotional totes — is the most limited canvas: it accepts basic fabric markers but resists most other methods and is generally better left to professional screen or digital printing rather than DIY approaches.
The rule of thumb before starting any decoration project: identify your bag's material, choose your technique accordingly, and always wash and iron the bag first. Clean, heat-set fabric accepts ink, paint, and adhesive far more consistently than fabric that still carries the finish applied at the manufacturing stage.
Content
Fabric painting is the most widely used tote bag decoration method for good reason: it requires minimal upfront investment, produces immediately visible results, and is genuinely achievable for beginners without prior art experience. The key distinction to understand before starting is the difference between fabric paint and acrylic paint — both work on canvas totes, but fabric paint is formulated to remain flexible after drying, preventing the cracking that occurs when rigid acrylic layers flex during use and washing.
The essential setup: lay the tote flat on a protected surface and insert a piece of cardboard between the front and back panels. The cardboard does two things — it prevents paint from bleeding through to the back layer, and it gives the front panel a firm surface to paint against, producing cleaner edges. Use painter's tape to mask any areas you want to keep clean, then apply paint with foam brushes for flat coverage or fine-tipped brushes for detail work.
Popular painted design approaches include: geometric color blocking (use tape to create sharp lines between colors), botanical motifs (loose floral shapes painted freehand in a few confident strokes), typography (letter stencils paired with fabric paint create clean, readable text), and abstract mark-making (sponges, crumpled paper, and roller stamps all create interesting texture). As the creative guide from BagzDepot's tote bag decorating resource highlights, the options for painted designs are effectively limitless once you commit to a style direction and choose colors intentionally rather than randomly. Heat-set finished paintings with an iron or clothes dryer to lock the pigment into the fiber and extend washability significantly.
When painted freehand designs feel too unpredictable and you want consistent, repeatable results — especially across multiple bags — stenciling and screen printing are the logical next steps.
Stenciling uses a pre-cut template (either purchased or cut from acetate or cardstock) held flat against the bag surface while fabric paint or spray paint is applied through the openings. The key to clean stencil edges is using a dry brush or stencil brush with minimal paint loading — excess paint bleeds under the stencil edge and blurs the line. Press the stencil firmly against the fabric, stipple or dab the paint upward rather than brushing sideways, and lift the stencil cleanly before the paint has a chance to seep. Reusable plastic stencils last indefinitely and can be used to produce a consistent logo or pattern across dozens of bags.
Screen printing takes this repeatability further. A mesh screen with a blocked-out design (created using photo emulsion or thermoplastic stencil film) allows ink to pass through only in the intended areas, producing crisp, professional-looking results at high volume. Screen printing is overkill for a single bag but becomes highly efficient when decorating 20 or more bags with the same design — a common requirement for event merchandise, corporate promotional items, and school or sports team gifts. The setup cost is higher than other methods, but the per-unit cost drops sharply with volume.
Heat transfer methods bridge the gap between hand-crafted and professional-printed results, and they have become dramatically more accessible as cutting machines (Cricut, Silhouette) and heat presses have moved into consumer price ranges.
Heat Transfer Vinyl (HTV) is a thin colored film with a heat-activated adhesive on one side. You cut a design from HTV using a cutting machine or craft knife, weed away the excess material, then press the design onto the bag using a heat press or household iron. The result is a smooth, slightly raised design with clean edges and good wash durability. HTV works best for text, logos, and graphic shapes; it is less suited to photographic images or complex gradients. It adheres best to cotton canvas; polyester bags require lower temperatures and shorter press times to avoid scorching.
Inkjet heat transfer paper allows full-color photographic designs, illustrations, and multi-color graphics to be printed on a home inkjet printer and then transferred to the bag with an iron. Light-colored transfer paper (for white or cream bags) produces the most vibrant results; dark-colored transfer paper (for bags below white) adds a slight texture and carries a different color profile. For the sharpest results, use a light-colored canvas bag and a high-resolution source image — fine text and thin lines lose clarity in the transfer process, so bold, clean graphics perform better than intricate detail work.
Embroidered tote bags occupy a category of their own in the handmade market — they take significantly more time than any painted or transferred design, but the result carries a tactile quality and perceived value that other methods cannot replicate. An embroidered tote feels genuinely artisanal in a way that printed alternatives never quite achieve.
The minimum equipment for tote bag embroidery: an embroidery hoop (to hold the fabric taut and prevent puckering), embroidery floss in your chosen colors, a sharp embroidery needle, and a water-soluble fabric marker to transfer your design outline onto the bag surface. For beginners, two stitches cover the vast majority of simple designs: the backstitch (for outlines, lettering, and line art) and the satin stitch (for filling solid color areas). Both stitches are learnable in an afternoon and produce results that look far more involved than the skill level required.
Popular embroidery subjects for tote bags include botanical illustrations (single flowers or leaf sprigs at the bag's lower corner), monograms and name lettering, simple animal outlines, and abstract geometric patterns using repeating geometric fill stitches. Canvas is the ideal ground for embroidery — its tight weave holds stitches cleanly without the needle holes becoming visible, and it lies flat in a hoop without distorting. Thick Oxford fabric can be embroidered but requires a heavier needle and more physical effort per stitch.
For decoration effects that feel genuinely unique — where no two results are identical — tie-dye and bleach painting deliver visual impact that no stencil or transfer can replicate.
Tie-dye uses fiber-reactive dyes applied to fabric that has been twisted, folded, or bound with rubber bands before dyeing. The dye penetrates only the exposed areas, creating the characteristic burst, spiral, or stripe patterns where color transitions to white. Traditional tie-dye on a white canvas tote produces vibrant, saturated results. Cold-water fiber-reactive dyes (such as Procion MX) give the most vivid outcomes on cotton canvas and are reasonably wash-fast once properly set with soda ash. Work outdoors or in a ventilated area, wear gloves, and allow adequate dye setting time (6–24 hours wrapped in plastic) before rinsing.
Bleach painting or reverse tie-dye works on dark-colored tote bags — navy, black, or forest green canvas — to create a lighter design by removing dye rather than adding it. Diluted household bleach applied with a brush, dropper, or spray bottle lifts the base color progressively, creating light gold to white marks depending on exposure time. This is one of the most dramatic-looking techniques for the effort involved: a few seconds of bleach exposure on a dark canvas bag creates high-contrast, organic-edged designs that look complex but require no artistic skill. Always wear protective gloves and work in a ventilated space; rinse thoroughly with clean water and a mild bleach neutralizer (hydrogen peroxide solution) once the desired tone is reached.
Not all tote bag decoration has to be flat. Three-dimensional embellishments — patches, pins, and sewn appliqué — add texture and visual weight that painted or printed designs cannot achieve, and they can be added, removed, or rearranged over time in ways that permanent decoration cannot.
Iron-on and sew-on patches are the fastest route to a decorated tote with no artistic effort required. Embroidered patches in virtually every subject — band logos, botanical illustrations, retro graphics, typography — are widely available and can be applied in minutes with an iron (for iron-on varieties) or stitched in place with a few passes of thread for a more permanent bond. Layering several patches in a collage arrangement across one panel of a tote creates a distinctive, personalized aesthetic that is very popular in fashion-forward DIY and streetwear contexts.
Enamel pins and button badges can be clustered at the strap base or scattered across the front panel to create a collect-and-display aesthetic. They are fully reversible — pins come out and go in elsewhere — which makes them particularly suitable for people who like to update their bag's look seasonally or as their pin collection grows.
Appliqué involves cutting shapes from contrast fabric and sewing them to the surface of the bag, creating a layered, textured design. Cut shapes from woven fabric or felt (felt does not fray and requires no edge finishing), pin them in position, and attach with a running stitch around the perimeter. Iron-on adhesive (such as Bondaweb or Heat'n Bond) can be used to hold appliqué pieces in place before stitching, making the process significantly easier for complex shapes.
The simplest possible approach to tote decoration requires nothing more than a fabric marker and an idea. Fabric markers — felt-tipped pens loaded with fabric ink rather than regular dye — draw directly onto canvas with precision and permanence, requiring no additional tools, no setup, and no experience beyond the ability to draw or trace.
Fabric markers work especially well for: hand-lettered quotes and phrases (the tote bag equivalent of a piece of wall art), dense pattern work like mandalas and geometric linework, character illustrations for children's bags or themed gifts, and collaborative doodle projects where multiple people add to the design over time. Insert the cardboard divider between bag panels before drawing to prevent any ink bleed-through. Use a light pencil sketch or a printed template placed inside the bag and visible through the fabric (hold up to a light source) to transfer complex outlines before going over them in marker.
For group projects — classroom activities, team-building events, bachelorette parties, or kids' birthday parties — a set of fabric markers and a stack of plain white tote bags provides a structured creative activity with a functional, take-home result. Each participant decorates their own bag, producing a personalized outcome from a single simple setup.
Decorated tote bags are among the most effective and well-received promotional items across corporate events, trade shows, charity fundraisers, retail brand campaigns, and community organizations. The combination of daily utility (people actually use tote bags) and visible branding (the exterior surface displays your design in public) makes customized totes a high-ROI marketing tool compared to disposable promotional materials.
For event and brand applications, the decoration method selection shifts toward processes that deliver consistent, reproducible results across quantities of 50 to several thousand units:
For bulk procurement of undecorated base totes as the canvas for your customization program, the plain tote bags for custom decoration and branding range offers multiple material options — canvas, Oxford fabric, and non-woven — in sizes suitable for everyday shopping, event giveaways, and corporate gifting. For events where temperature control is part of the offering (food festivals, catering, health and wellness brands), insulated tote bags for functional personalization projects provide the same customizable exterior surface with the added practical value of thermal insulation. For production planning guidance on sizing and specifications, the tote bag dimensions guide for production planning covers standard sizing and how dimensional choices affect material cost and final appearance.
The final step — and arguably the most important — is matching your chosen decoration technique to a bag construction that can support it. A quick decision framework:
A well-decorated tote bag — regardless of the technique used — starts with a well-made base. Consistent stitching, reinforced handles, and quality fabric that holds its shape after washing are the foundations that make decoration last. Choosing your base bag carefully before investing time in decoration is the decision that determines whether your finished tote looks professional or simply well-intentioned.
1. Understanding Shopping Bags Shopping bags are essential tools in modern retail and daily life. They serve as a convenient way to carry groceries, c...
View More1. Introduction In our increasingly mobile and digital world, the laptop has become the central hub of our professional and personal lives. It connect...
View MoreLearn how to choose the perfect crossbody water bottle sling bag — sizing, materials, wearing styles, packing checklist, top features to prioritize, a...
View MoreAn innovative enterprise that continuously strives to have its own brand through its own efforts. bag production factory
Phone: +86-13906735273
Tel: +86-573-85605006
Email: zhouyueliang@L-jie.com
Email: sunny@L-jie.com
Add: No.99 Xinchen Road. Xindai, Pinghu, Zhejiang, China
Copyright© 2025 Pinghu Liangjie suitcase & bag Co., Ltd. All Rights Reserved.
 Custom Luggage Bags Manufacturers

 English
 Français
 Español
 Deutsch
 عربى
عربى